The top 3 tools to have on hand for making prototypes
Last week we looked at 5 great components you’ll want to have available for creating your prototypes. Today, we’re going to talk about some of the best tools to have on hand to assist you in creating those prototypes.
I’m going to tackle this by category, then dive into some of the possible options you might want to consider, from the basic and inexpensive possibilities to the top-of-the-line gear.
You really don’t need that much to get started, as you will see. But you might be able to save yourself some time and energy by upgrading your tools as you design more games and create more prototypes.
#3 Hole Punchers and Corner Rounders
While not critical for making prototypes, having hole punchers and corner rounders at hand can make your prototype easier to create and nicer to handle.
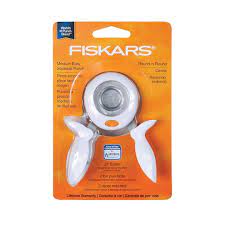
Hole punchers come in all different shapes and sizes. However, the ones that will likely be the most helpful are the circular hole punchers. Circles are difficult to cut out perfectly by hand and it can take a lot of time to create a large quantity of circular tokens. Being able to line up a hole puncher and create a perfectly circular token every time can be very nice.
They also allow to you cut perfectly circular stickers from sticker sheets. You can then slap these on discs or other components.
I have circular hole punchers in a few different sizes, as well as one hexagonal hole punch, which is great for creating hexagonal tiles (another shape that is a pain to cut out). It’s not quite as large as I would like, but it was the largest one I could find, so I just had to adapt my hex sizes.
There are plenty of other shapes you will see for hole cutters both online and in crafting stores, however, circular and hexagonal shapes will likely be the ones you will use most. You can even start with one circular hole puncher of a good size (say ¾”) and use this for most of your prototyping needs. Just base your components on what you have available.
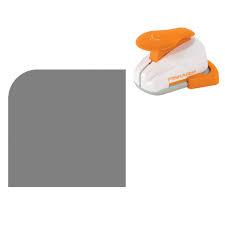
A corner rounder can also be a helpful tool. They do just as the name says. Rounding card corners can be very time-consuming, but they can help you avoid those sharp card edges.
The other alternative is sleeving your cards, as mentioned in my previous article.
#2 Cutting Tools
Let’s face it. When you’re making physical prototypes, you’re going to have to do a lot of cutting.
At first, you can get by with scissors just fine, but after making a few prototypes, you’ll probably start wondering if there is a better way (and one that won’t cause as many hand cramps!).
The main two types of cutters on the market that you might consider for making prototypes are guillotine cutters and rotary cutters.
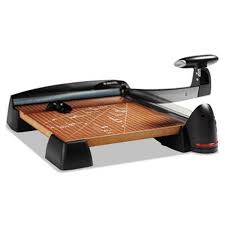
I picked up a rotary cutter myself, but found it to be a bit finicky and it didn’t always do the job as well as I had hoped. So, after seeing my oft co-designer whip out his X-acto guillotine cutter and then slice and dice his way through a sheet of cards, I knew I had found my next purchase.
Either style of cutter should have guidelines and markings on the board to allow you to ensure your cuts are straight and accurate.
If you like to craft using cardboard and foam board, you’ll probably also want to get yourself a good pen knife (and some extra blades). This will allow you to make precision cuts. A self-healing mat to put under your materials can also be very useful and prevent damage to your table.
If you really want to go crazy and have both lots of money to spend and lots of time on your hands, you could always pick up a Cricut.
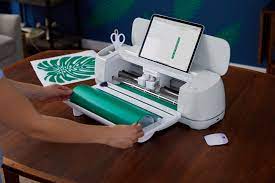
This is a device loved by many crafters that allows you to print and cut sheets of cards, tokens, and boards (or simply cut pre-printed materials). You do need to figure out templating and setting things up to cut precisely where you want, but it could become a time-saver if you’re making a ton of prototypes.
I’ve looked into different models they offer and talked to some other game designers about this tool and came to the conclusion that it wasn’t right for me. That’s not to say that it couldn’t be super helpful to you. It would just require an investment in time and money to learn how to best adapt it for your prototypes.
Again, it comes down to what tools fit your budget and prototyping needs.
#1 Printer
Unless you want to run down to the local Kinkos or other printing shop every time you make a new version of a prototype, you’re going to want to have a good printer.
You can get anything from a cheap little printer to a high-end multi-functional device.
The main criteria you need to think about are:
- Can it print well on various materials (especially thicker materials like cardstock)?
- What are the operating costs for the printer (ink/toner cost)?
Personally, I’ve had to print a lot of prototypes, particularly components for my game, Relics of Rajavihara, to send out to reviewers. I knew I would be going through a lot of ink. Rather than spend a ton on replacing ink cartridges and run into delays every time one ran out, I invested in a mega tank printer.
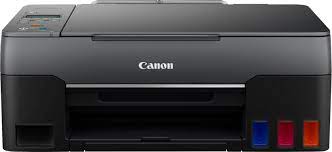
These printers let you print a TON of materials on one tank. You can also see your ink levels at all times, so you’ll have plenty of time to order more ink and have it ready before you need it. The ink bottles they use for refilling are much less expensive than ink cartridges and they allow you to print a whole lot more as well. That’s what I call a win-win.
You could even look into 3D printers. This is something I haven’t researched or used myself, so there’s not much I can share on the topic. They can be used for printing components such as blocks and miniatures, so they serve a different purpose than standard printers. If this is something that would help elevate your prototypes, it may be worth the research.
What you choose will be up to you based on your needs and budget.
Wrapping it up
Printers, cutting tools, hole punchers, and rounders. All these tools can help you in making your prototypes faster and nicer to handle.
However, you don’t have to start with everything top of the line. Imagine buying all these tools and then after making your first prototype you decide that game design isn’t right for you! So, start off small and build your tools up over time, getting only what you need when you need it.
What other tools have you found to be helpful when making prototypes?
Please leave a comment and share what you’ve found to be helpful.

7 comments
Steve Bollenbaugh
This was a timely article for me; thank you!
Any suggestions as what works best for punching out numerous square holes for resource cubes and dice when using illustration board? I’ve seen square leather working punches but I don’t know how well they would work, especially if they tend to dull too much over time or otherwise don’t hold up well to frequent use. (I also noticed that manufacturers tend to not give sizes.)
Joe Slack
My pleasure, Steve! I haven’t worked with illustration boards, so I wouldn’t be able to recommend any specific tools that might help. Personally, I would rather just pick up some cubes and dice from Game Crafter or another store and use those.
Steve Bollenbaugh
Thank you for the quick reply, Joe. I’m actually looking for something that punches out the right size square holes for things like dual-layer player boards which would hold tokens, cubes, and dice. (Preferable to getting out the X-Acto knife…)
I’m thinking of using illustration board since its better for drawing/painting if I choose to do so and more durable (at least that’s my impression) than chipboard for components that I want to be more specialized and permanent: https://www.dickblick.com/products/crescent-no-100-cold-press-illustration-board/
(Punching holes in neoprene mouse pads similar to the Too Many Bones player mats might be interesting, too.)
[I do realize that putting a lot of extra time and effort into prototypes, especially early ones is generally wasted time but at a certain point creating something a little more polished is motivating — I suspect that over time, ’ll probably grow out of this.]
Steve Bollenbaugh
By the way, I have seen leather punching tool sets such as on Amazon but they seem to like to not give sizes and the dies seem a bit unsubstantial and awkward to use: https://www.amazon.com/YaeTek-Hollow-Handmade-Leather-Plastic/dp/B07KPYLRM9/
Joe Slack
If it’s not too expensive, this might be worth a shot. It depends. The more objects you need to punch out, the more worthwhile it will be to invest. Less so for one-offs. We generally use an X-acto knife on foam boards for prototypes but this is not for everyone.
Alex
Great article Joe – v. useful to know what’s out there for prototyping … thanks
Joe Slack
Glad to help, Alex!